


1.2 Operation Safety (การปฏิบัติงานที่ปลอดภัย)
2. Turning ON and OFF the Power Supply
2.1 Turning ON the Main Power Supply (เปิดเมนไฟฟ้าตู้ควบคุมหุ่นยนต์)
Confirm that nobody is present in the working envelope of the robot when turning on DX100 power supply.
ตรวจสอบให้แน่ใจว่าไม่มีใครอยู่ในพื้นที่ทํางานของหุ่นยนต์ก่อนทําการเปิดใช้งานของหุ่นยนต์
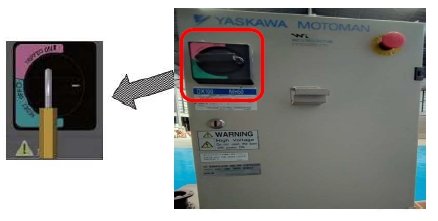
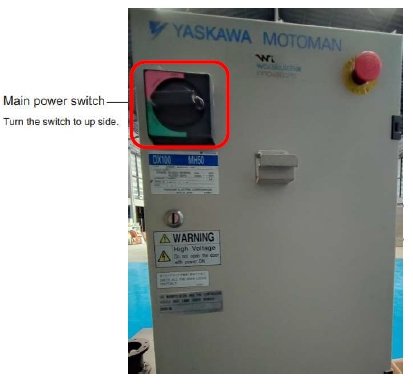
- Turn on the main power supply of DX100
- เปิดสวิทช์เมนไฟฟ้ าตู ้ควบคุมหุ่นยนต์ DX100

-When the power is supplied to the controller, the controller goes through the initial diagnostic tests and creates the current position data.
-เมื่อจ่ายไฟฟ้าให้กับตู้ควบคุม ตู้ควบคุมจะทําการ Restart และ Initial

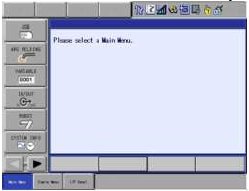
-When it starts normally, the screen is displayed below.
-เมื่อ initial เสร็จแล้วจะขึ้นหน้าต่างเหมือนรูปด้านล่าง แสดงว่าเครื่องพร้อมใช้งานแล้ว
2.2 Turning ON the Servo Power (เปิดการใช ้งานเซอร์โว)
If the emergency stop button is pushed, Servo Power Supply can’t be switched on.
ถ้าปุ่ม emergency หยุดอยู่ จะไม่สามารถเปิดใช้งานเซอร์โวได้
2.2.1 servo on "PLAY" mode
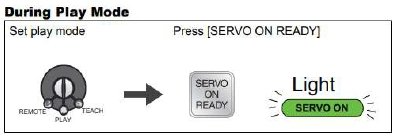
select key to PLAY mode and then press "SERVO ON READY" on Pendant and lamp SERVO ON will Light.
หมุนกุญแจไปที่ "PLAY" จากนั้นกดป่ ุม SERVO ON READY บน Pendant หลอดไฟ SERVO ON จะสว่างค้าง
2.2.2 servo on "TEACH'' mode
-select key to "TEACH" mode and then press "SERVO ON READY" on Pendant, lamp "SERVO ON'' will blink
-หมุนกุญแจไปที่ TEACH จากนั้นกดปุ่ม SERVO ON READY บน Pendant หลอดไฟ SERVO ON จะติดกะพริบ
-grip the ENABLE SWITCH backside the Pendant, if completed the SERVO ON lamp will still light
-ใช้มือกําสวิทช์ด้านหลัง Pendant โดยกดลงไปนิดเดียวหลอดไฟ SERVO ON จะติดค้าง

2.3 Turning OFF the Power Supply (ปิดเมนไฟฟ้าตู ้ควบคุมหุ่นยนต์)
2.3.1 Turn Off Servo Power (ปิดเมนไฟฟ้าเซอร์โว)
‐press emergency button on Pendant or DX100
-กดปุ่ม emergency บน Pendant หรือทีตู้ควบคุมหุ่นยนต์ DX100

2.3.2 Turn Off the Power Supply (ปิดเมนไฟฟ้าควบคุมหุ่นยนต์)
‐After turning off the servo power, turn off the main power
-หลังจากปิดเมนไฟฟ้าเซอร์โวแล้ว ใหทำการปิดเมนไฟฟ้าตู้ควบคุมหุ่นยนต์

3 Programming Pendant
3.1 Work Home Position
3.1.1 moving to Work Home Position
‐select key "TEACH" (หมุนกุญแจไปที่TEACH)
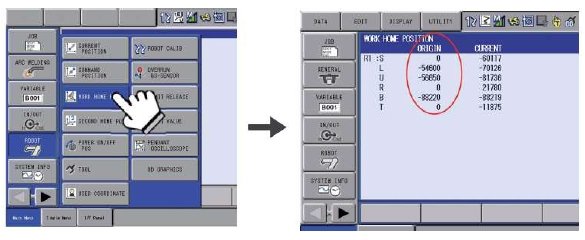
‐touch ROBOT > WORK HOME POS on Pendant menu, the Work Home Position will appeared
-ใช้นิ้ว แต่ที่เมนู ROBOT >> WORK HOME POS บนจอ Pendant จะปรากฏหน้าต่าง WORK HOME POS ขึ้นมา
‐press "SERVO ON READY" on Pendant (กดปุ่ม SERVO ON READY บน Pendant)
‐grip ENABLE SWITCH backside of Pendant > press "FWD" button on Pendant. The robot will moving to
Home position and stop automatically
-ใช้มือซ้ายกำปุ่มด้านหลัง Pendant ให้ไฟ Servo On ติดค้าง และมือขวากดปุ่ม FWD บน Pendant โรบอทจะวิ่งไปที่ตำแหน่ง Work Home และหยุดเองอัตโนมัติ เมื่อโรบอทหยุดแล้วก็ปล่อยมือ ถ้าโรบอทถึงตำแหน่ง WORK Home Position ORIGIN และ CURRENT จะเท่ากัน
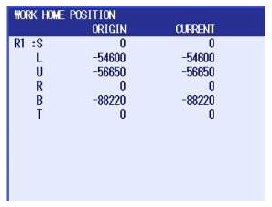
3.1.2 Register Work Home Position (สร้างตำแหน่ง Work Home ขึ้นใหม่)
‐moving to any position your requirment.
-เลื่อนหุ่นยนต์ไปยังตำแหน่งที่ต้องการทำ WORK HOME ใหม่
‐if meet your position press button MODIFY > ENTER on Pendant.
-เมื่อได้ตำแหน่งที่ต้องการแล้วให้กดปุ่ม MODIFY > ENTER ตามลำดับเพื่อบันทึกค่าใหม่

3.2 Teaching and Playback
3.2.1 Register new job
‐select key "TEACH" and on Pendant windows select menu "JOB'' > "CREATE NEW JOB''.
-หมุนกุญแจไปที่ TEACH จากนั้นกดเมนู JOB > CREATE NEW JOB ตามลำดับ
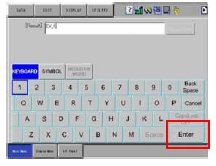
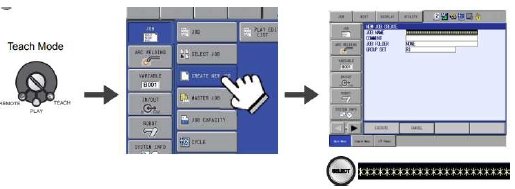 ‐input new job name after that press "ENTER'' 2 times.
-ตั้งชื่อ job แล้วกด ENTER 2 ครั้ง
‐press "EXCUTE" on Pendant to registered.
-กดปุ่ม EXCUTE บน Pendant เพื่อบันทึก
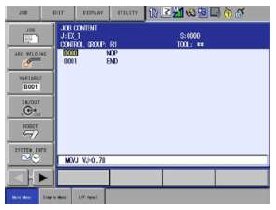
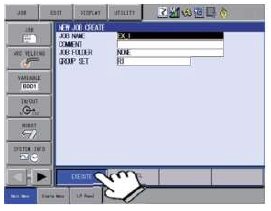 ‐window of new created job.
-หน้าต่างโปรแกรมหลังจาก create new job
3.2.2 Display Job List (ดู Job ทั้งหมดที่บันทึกไว้ในเครื่อง)
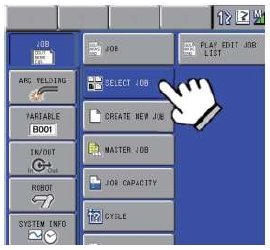
press menu "JOB" > "SELECT JOB" เลือกเมนู JOB > SELECT JOB
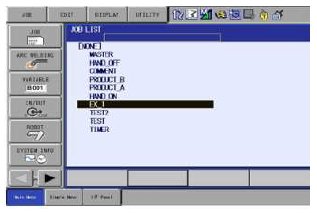
 ‐all job will show as below.
-JOB ทั้งหมดในเครื่องจะแสดงให้เห็นดังภาพ
‐press JOB as your requirement and press "SELECT" button on Pendant.
-กดเลือก JOB ตามที่ต้องการแล้วกดปุ่ม SELECT บน Pendant
3.2.3 Teaching
Position
‐moving robot to dicide the position.
-เคลื่อนที่หุ่นยนต์ไปยังตำแหน่งที่ต้องการ
‐set coordinate move robot by button each axis.

Motion
‐decide the path along which the robot moves between playback steps.
-กำหนดเส้นทางการเคลื่อนที่ของหุ่นยนต์แต่ละจุด

Speed
‐decide the speed which the robot moves between playback steps.
-กำหนดความเร็วในการเคลื่อนที่ของหุ่นยนต์แต่ละจุด
 3.2.3.1 Inputting Each Step (เพิ่มสเต็ปในโปรแกรม)
-Inputting the Speed with a Position and Interpolation
-ป้อนค่าความเร็วและตำแหน่ง
‐move robot to dicide position
-เลื่อนหุ่นยนต์ไปตำแหน่งที่ต้องการ
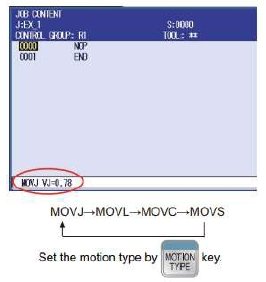
‐press "SELECT" button on Pendant to move curser to input line
กดปุ่ม SELECt บน Pendantเลือ